


Sourdough tips from an amateur
+a break from philosophizing

What does it mean to live our lives with Quality? To feed and clothe ourselves with it? to fill our homes with it? to raise our children according to its principles? What even is Quality? Penelope's Loom pursues a “domestic philosophy” which attempts to answer these questions.
Sometimes amateurs are our best teachers. They see the skill they are learning with a freshness experts often lack, simply because experts are so good at what they do that it becomes second-nature and they lose part of the reflexivity of the learning process. If you’ve learnt a foreign language, you’ve likely experienced a native of that language utterly struggle to teach or explain it, responding to your questions with “that’s just the way it is”. Not very helpful. I say this as someone who has spent half of her life studying foreign languages and a quarter teaching them. I’m not an amateur, luckily for my students, but I’m also not native, meaning I’ve been through the process of learning the languages with the reflective distance that language acquisition in childhood lacks.
Sure, there is a strong argument for learning by doing rather than constantly questioning, intellectualizing and rationalizing what it is that you’re learning. In language the latter can equate to learning about the language rather than learning the language itself, and produces language nerds who can tell you the perfect declension of any noun but who can’t hold a conversation. In sourdough baking, too, I imagine there is a tendency amongst beginners to fixate on all the technicalities of fermentation and the science behind the process, but never attain the confidence, through hands-on experience, to step away from these tools and simply get a feel for the process.
Both aspects of learning are important, in my view. Especially in the case of language-learning. If you are not fully immersed in the language with a community of speakers surrounding you who are actively invested in your acquisition, as parents are for their children, then it is necessary to use pedagogical shortcuts and theory to get you on your way, in addition to immersive language exposure.
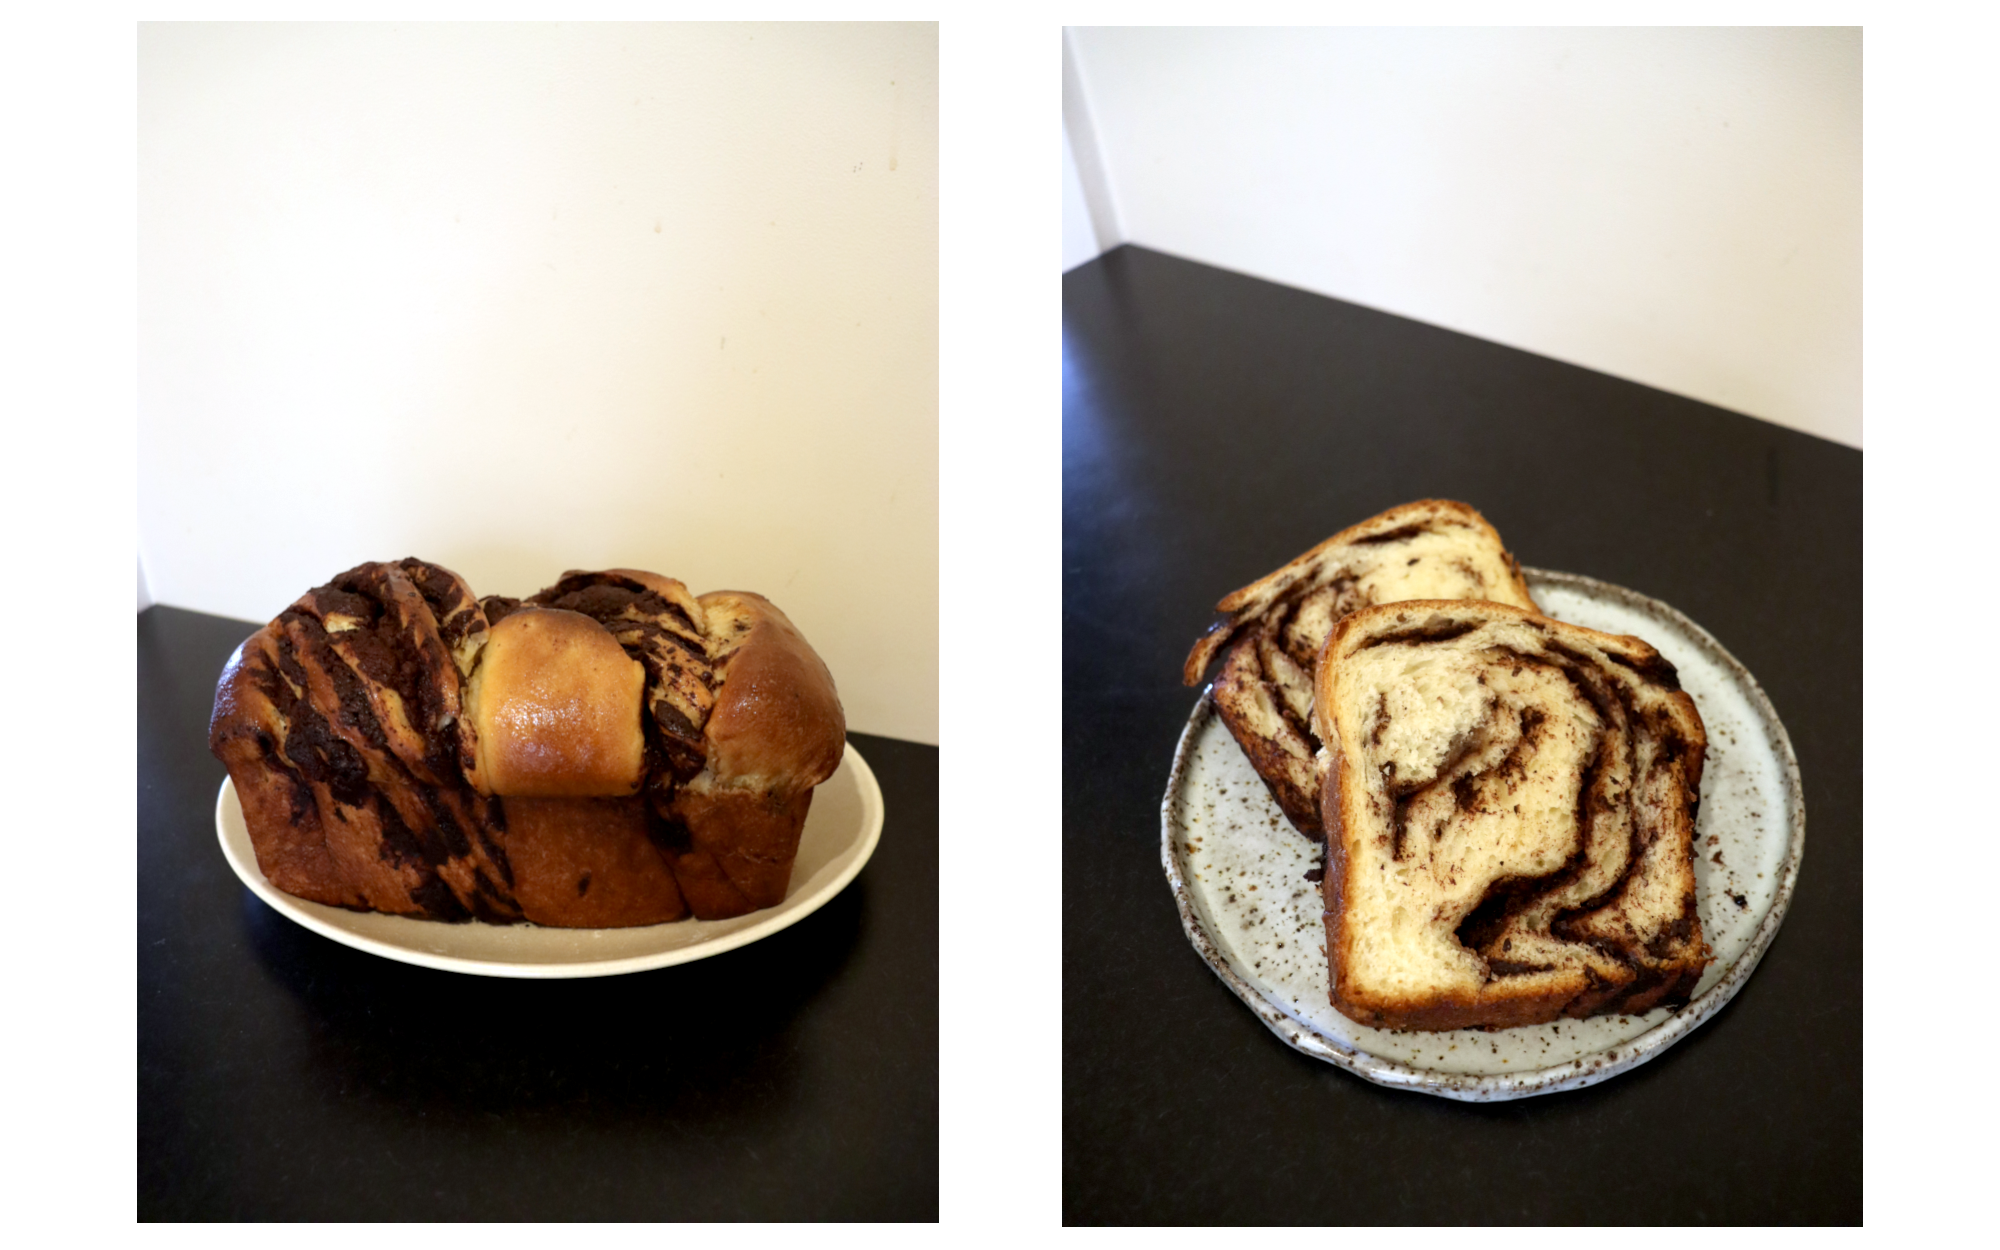
A few weeks ago I wrote a rather deep and perhaps slightly dramatic piece on what bread-making has taught me about strength/vulnerability and on what gluten has taught me about the psychological pitfalls of vilification and idolisation.
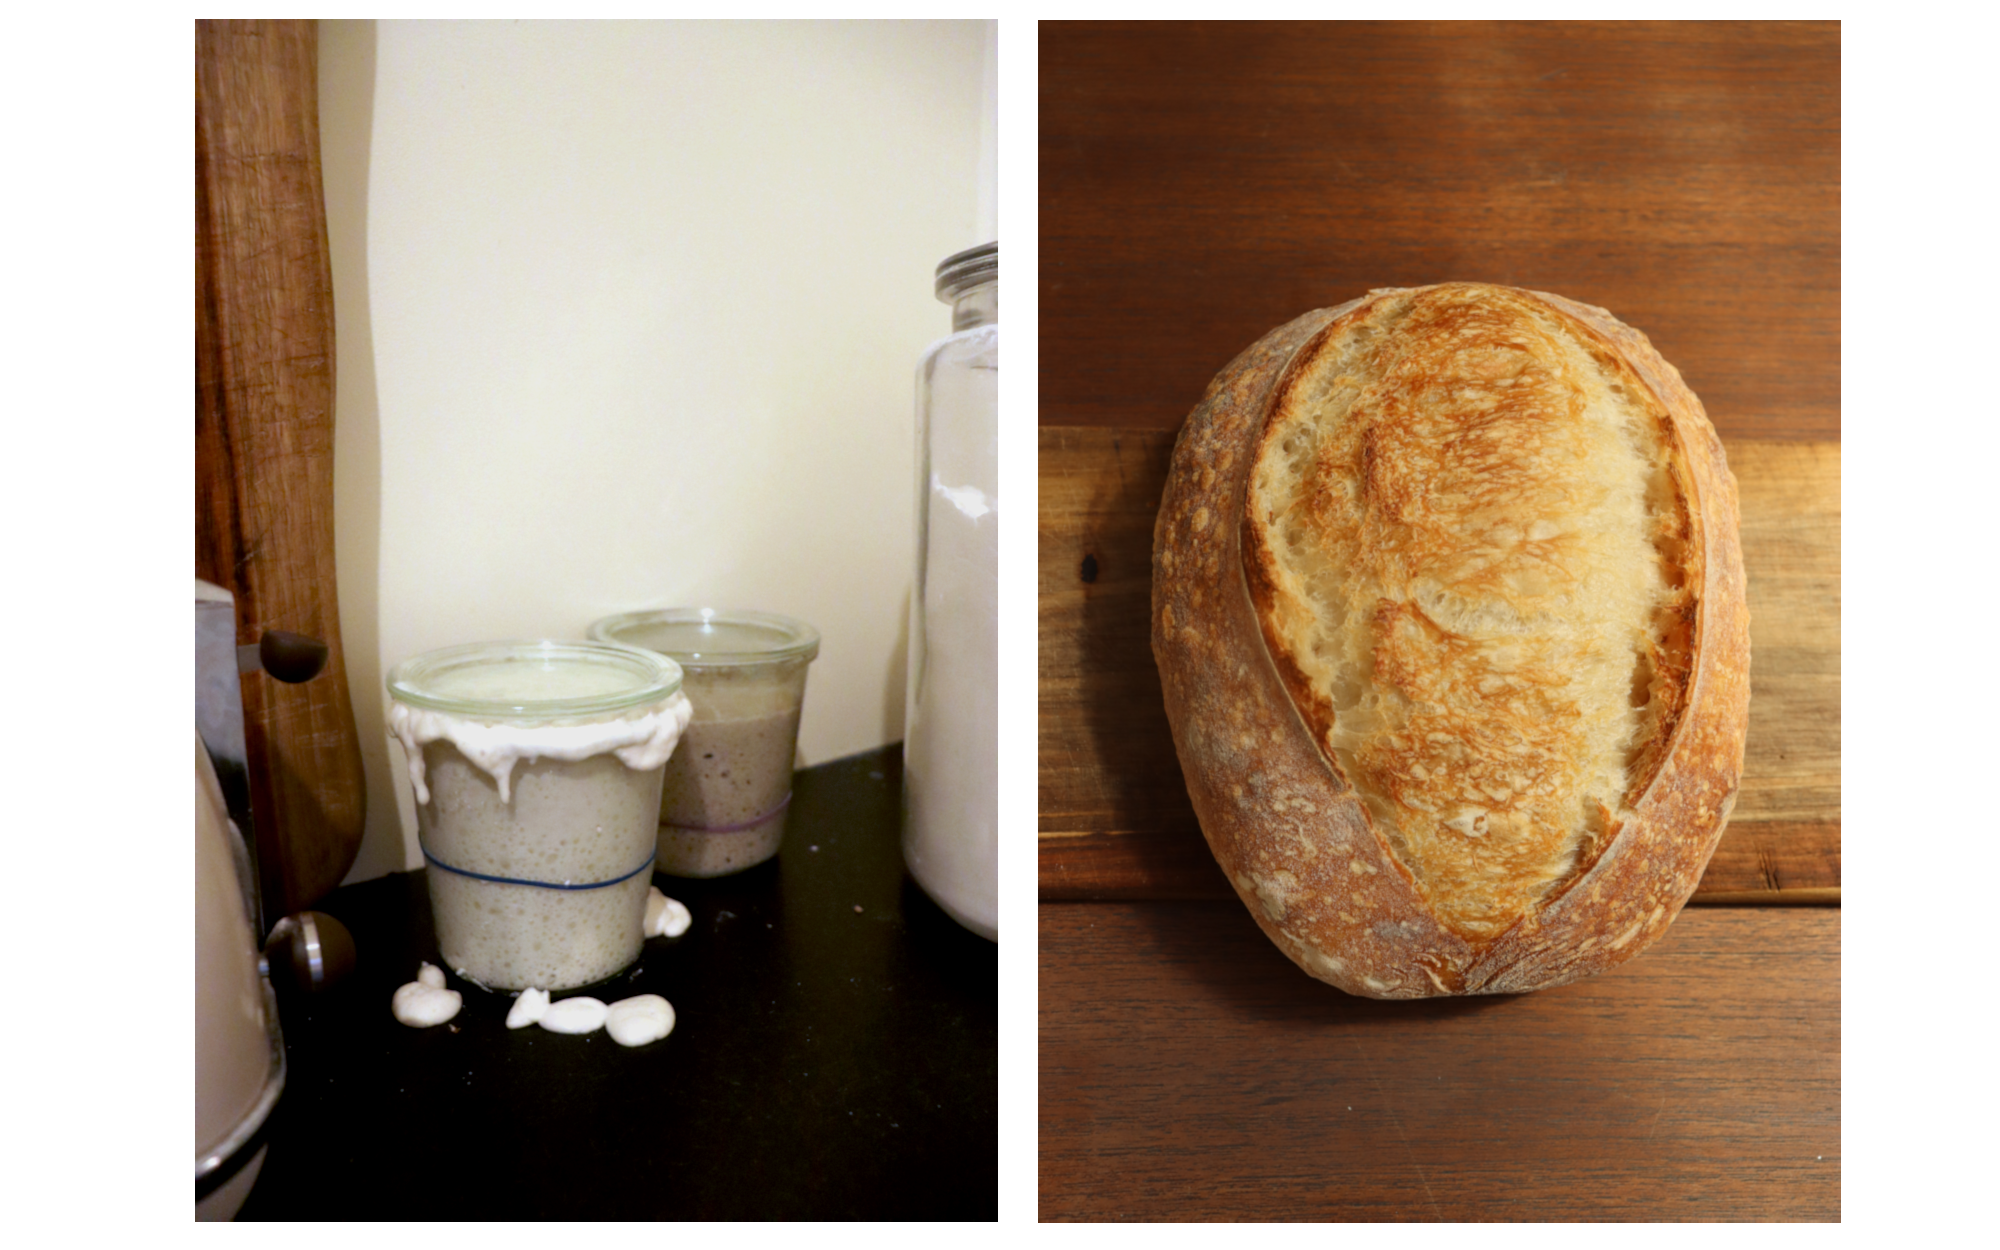
Here, I’d like to turn to the practical side of sourdough baking and present, without too many philosophical flourishes, what I’ve learnt as an amateur who has been working with sourdough for a mere 8 months but who has, in the course of those months, seen her bread go from very bad to very decent (in my humble opinion).
Sourdough Tips from an Amateur
These tips are for people who are already familiar with the basic stages of baking sourdough bread and who have an understanding of the basic terminology, but who are still struggling to “crack the code” despite closely following expert advice. This was my case for several months, until I figured out the few but significant things that were holding me back.
1) Start with your starter (+don’t be discouraged to source a mature one)
There are so many variables involved in sourdough baking but they are not all equal. If you’ll allow me to pull a statistic out of thin air, my guess is that the strength and health of your sourdough starter accounts for at least 50% of the outcome of your bread/bread products. A major mistake of mine was spending months fixating on the much less significant variables — exact percentage rise during bulk fermentation, temperature-checking, oven settings, shaping techniques, not cutting into the finished loaf too early, etc, etc. It’s not that these things are unimportant, but they blinded me to what was, in retrospect, the glaringly obvious primary cause of my failures: a weak sourdough starter.
Of course, anyone who is motivated to make their own bread is likely also intent on making their own sourdough starter. But there is a strong case to be made for sourcing an established starter off someone else, one with proven success, and then coming back to making your own starter down the track once you’ve got the rest of the process down pat. I was so attached to the idea that the starter had to be my own, a microbial reflection of my environment (…), that I wasted kilos of flour and effort on loaves that were being continually undermined by its weakness, despite most of the other variables likely being quite favourable to success. (Of course, much of this was not really “a waste” but just a valuable part of the learning process. But I do think I should have cottoned on to the starter issue a few crap loaves earlier than I did.)
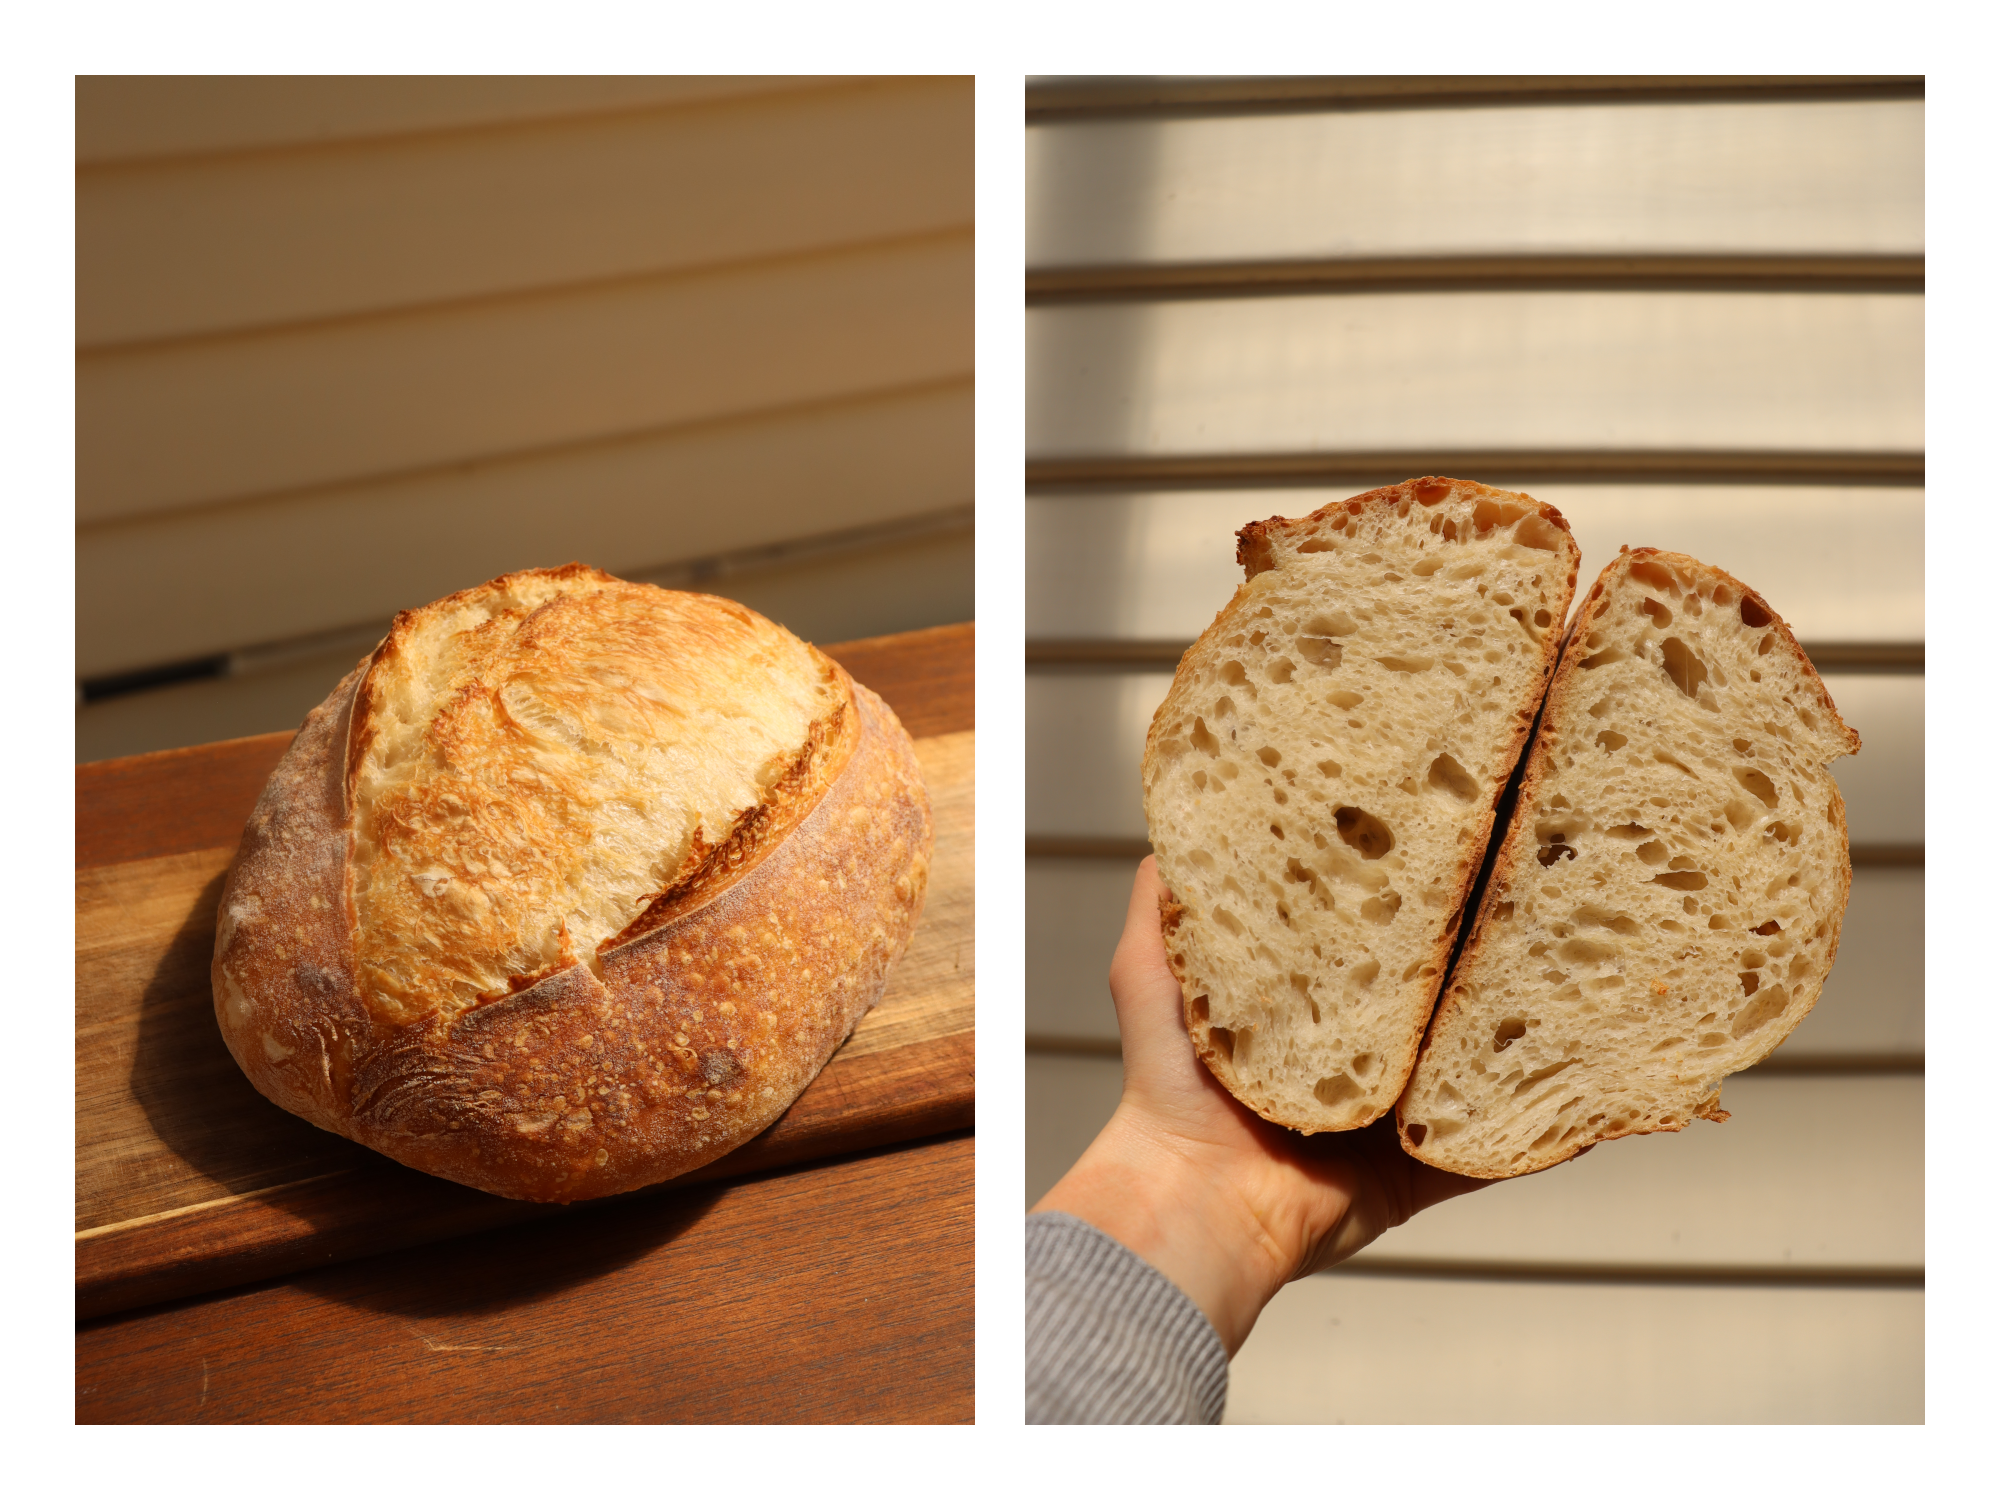
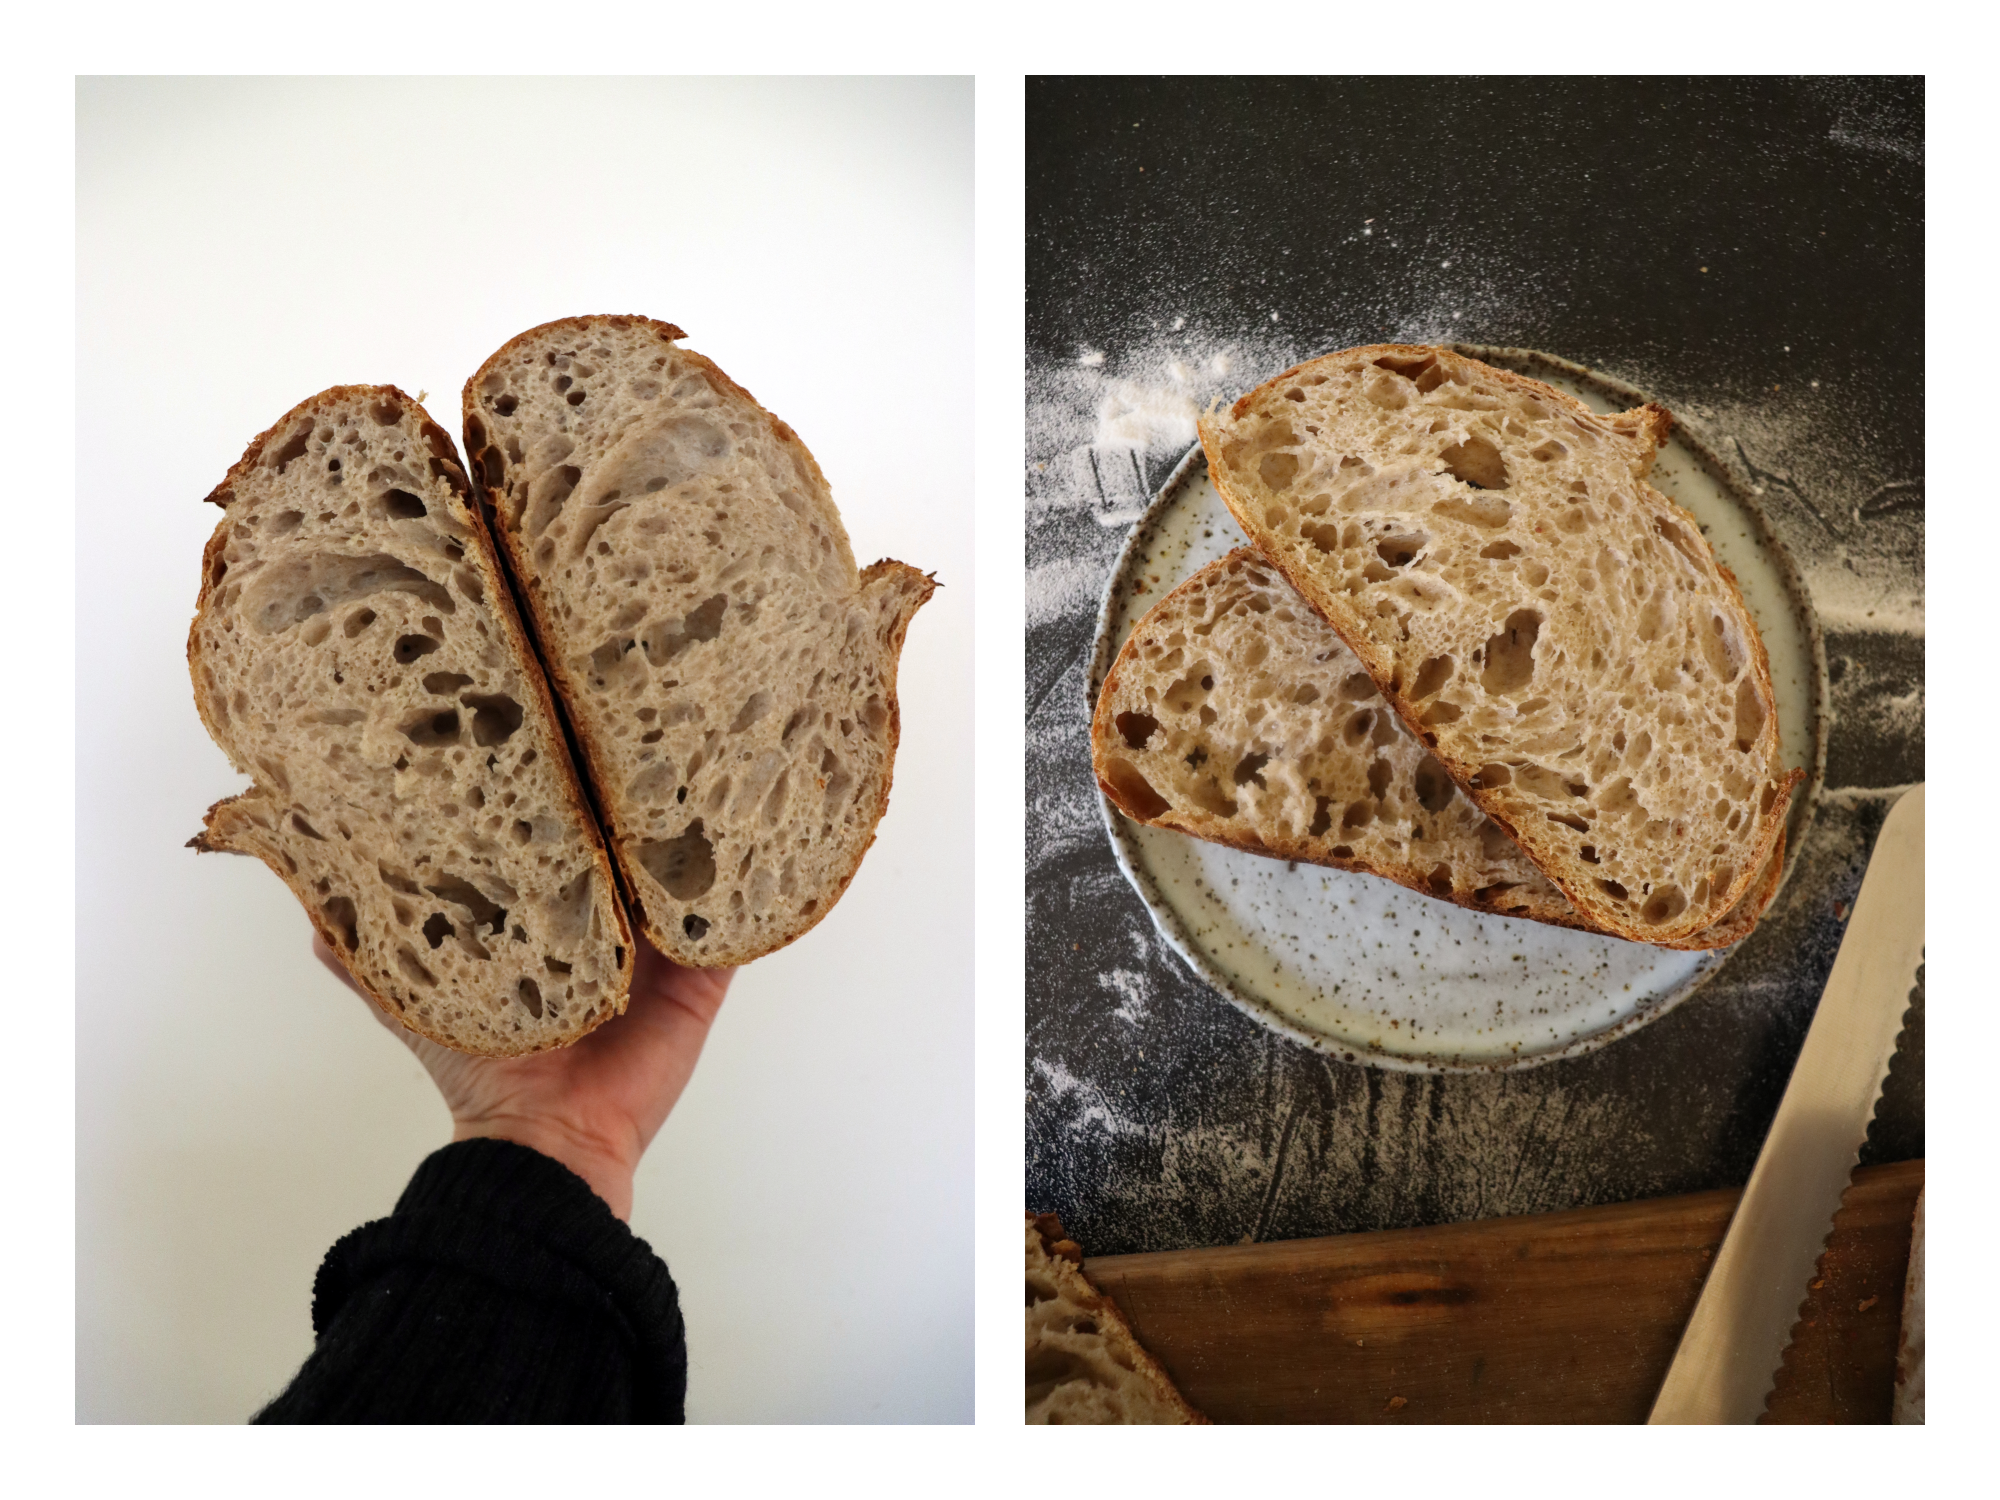
This is what I mean when I say not all variables are equal. If your starter is strong, you can get away with being a bit sloppy at other stages in the process. People get very fixated on whether their crumb reveals that the dough was “underproofed” or “overproofed”. In my experience, once I upgraded to a mature starter (I bought it dehydrated online and within 2 days, it was tripling and bursting with life), the margins between under- and over-proofing widened remarkably and became so much less of a concern. With a strong starter, it is actually difficult to overproof your dough, unless it is a very hot day and you forget about it. With a strong starter, the grace period for when to cut off bulk fermentation and proofing widens significantly, if other variables like temperature are within a reasonable range. Sure, there is a skill in discerning the ideal cut-off point, if you want a “perfect” loaf, but otherwise you will almost certainly still get a decent result. Since upgrading to my Herculean starter (it was justly named Hercules by the lady I purchased it from), I’ve had only a couple of overproofed loaves that I was very blasé about and left far too long on my seed-warming mat, in addition to long cold “retards” overnight in the fridge — but even then, they still rose well, were very delicious and were miles improved from the loaves with my old starter. Much of the crumb structures of my early loaves that I thought were “under” or “overproofed” were actually neither, but rather reflections of a weak starter.
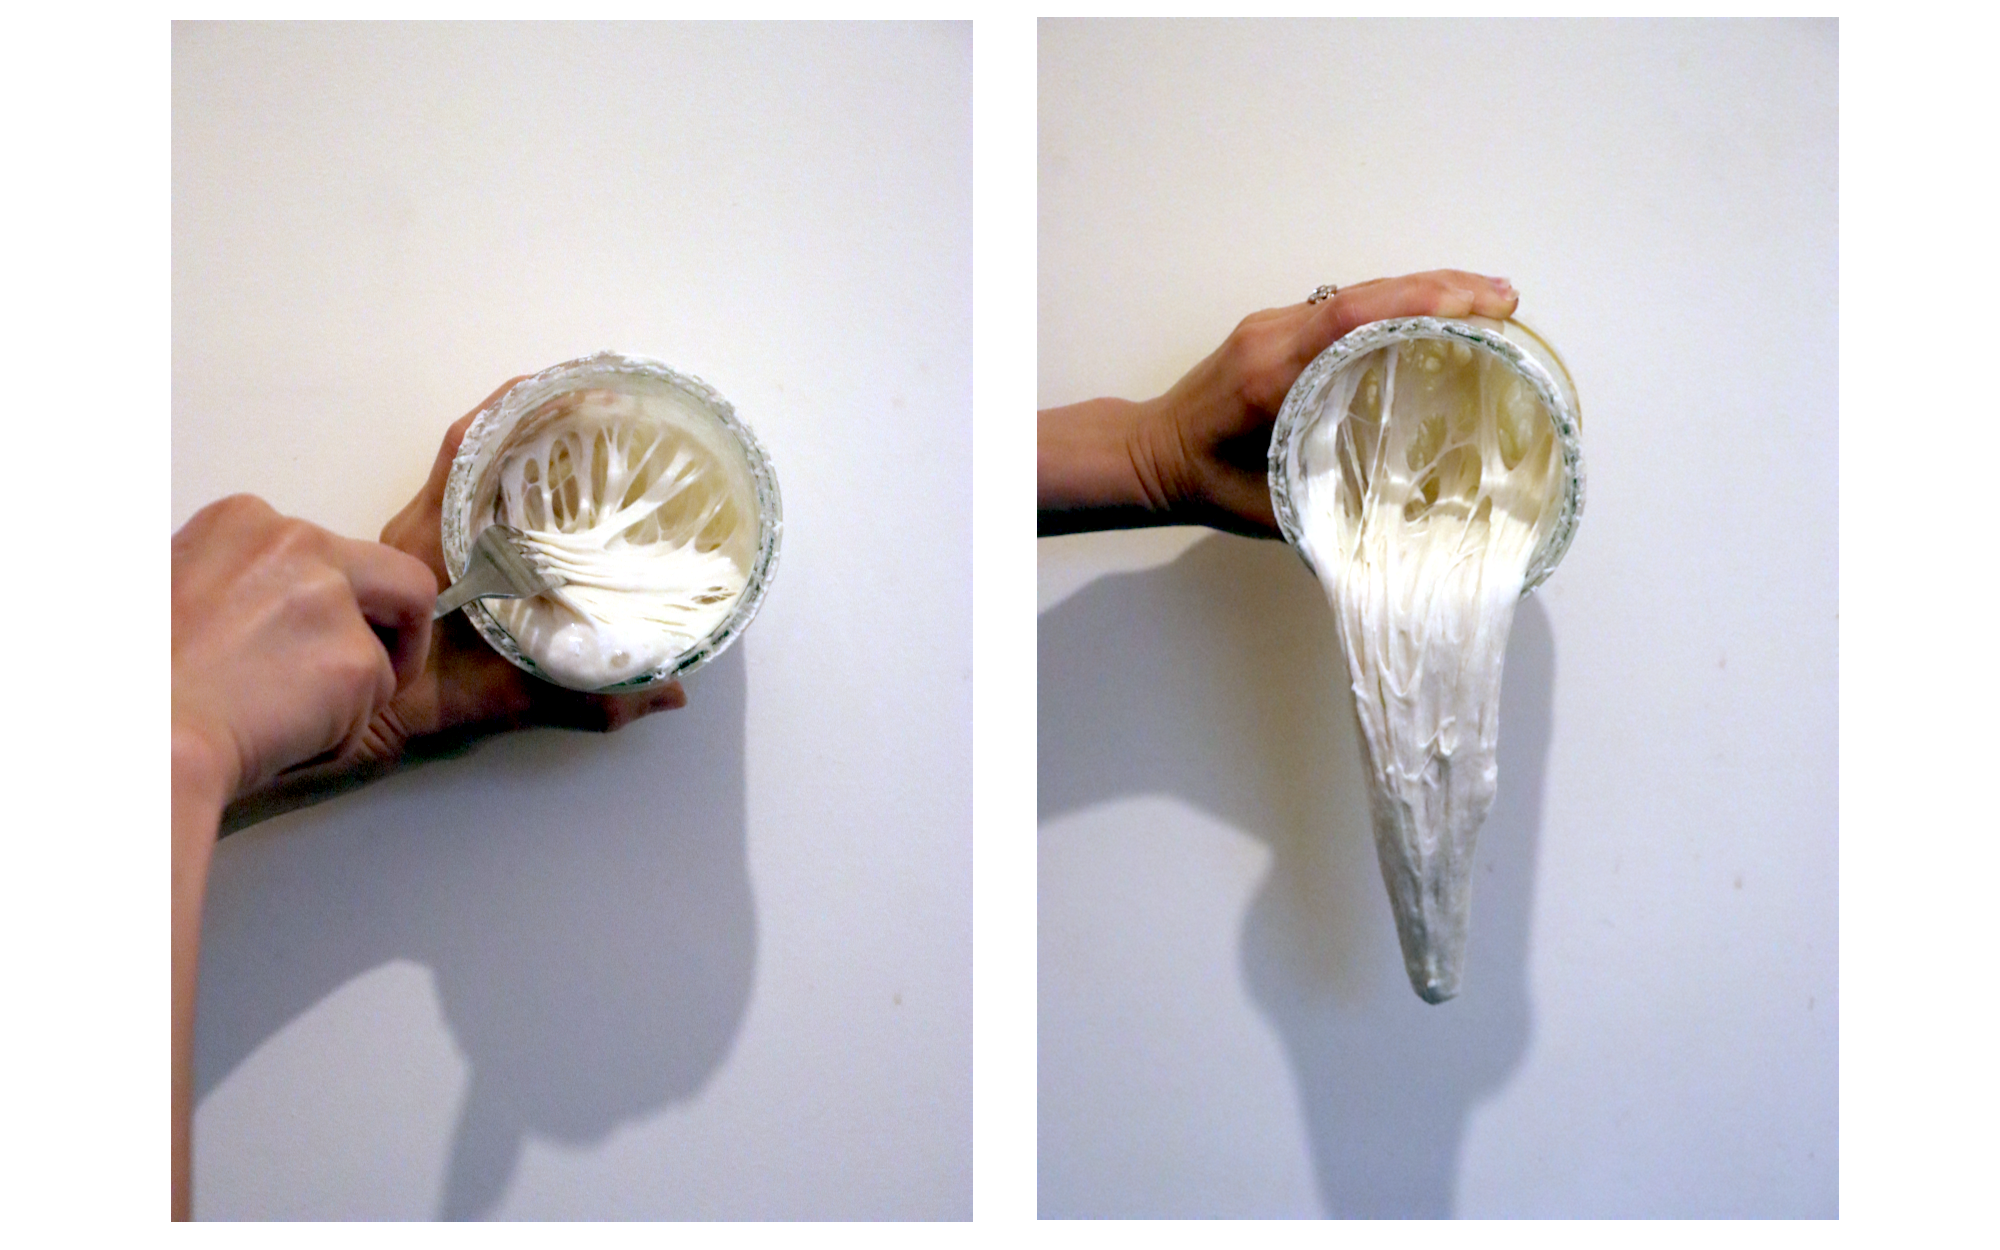
Now, what exactly indicates that your starter is strong enough? Starter strength is about more than being “bubbly” and rising. In my experience, it’s very possible for your starter to be bubbly, double in height and pass the float test, but still be insufficiently strong to fuel your bread. There are a couple of markers of strength that I’ve learnt from comparing my new starter with my old starter:
at its peak, the starter should have several obvious strings/strands of gluten that stick to the edges of the jar and exhibit significant resistance when being pulled from the outer rim to the centre with a fork (see image above);
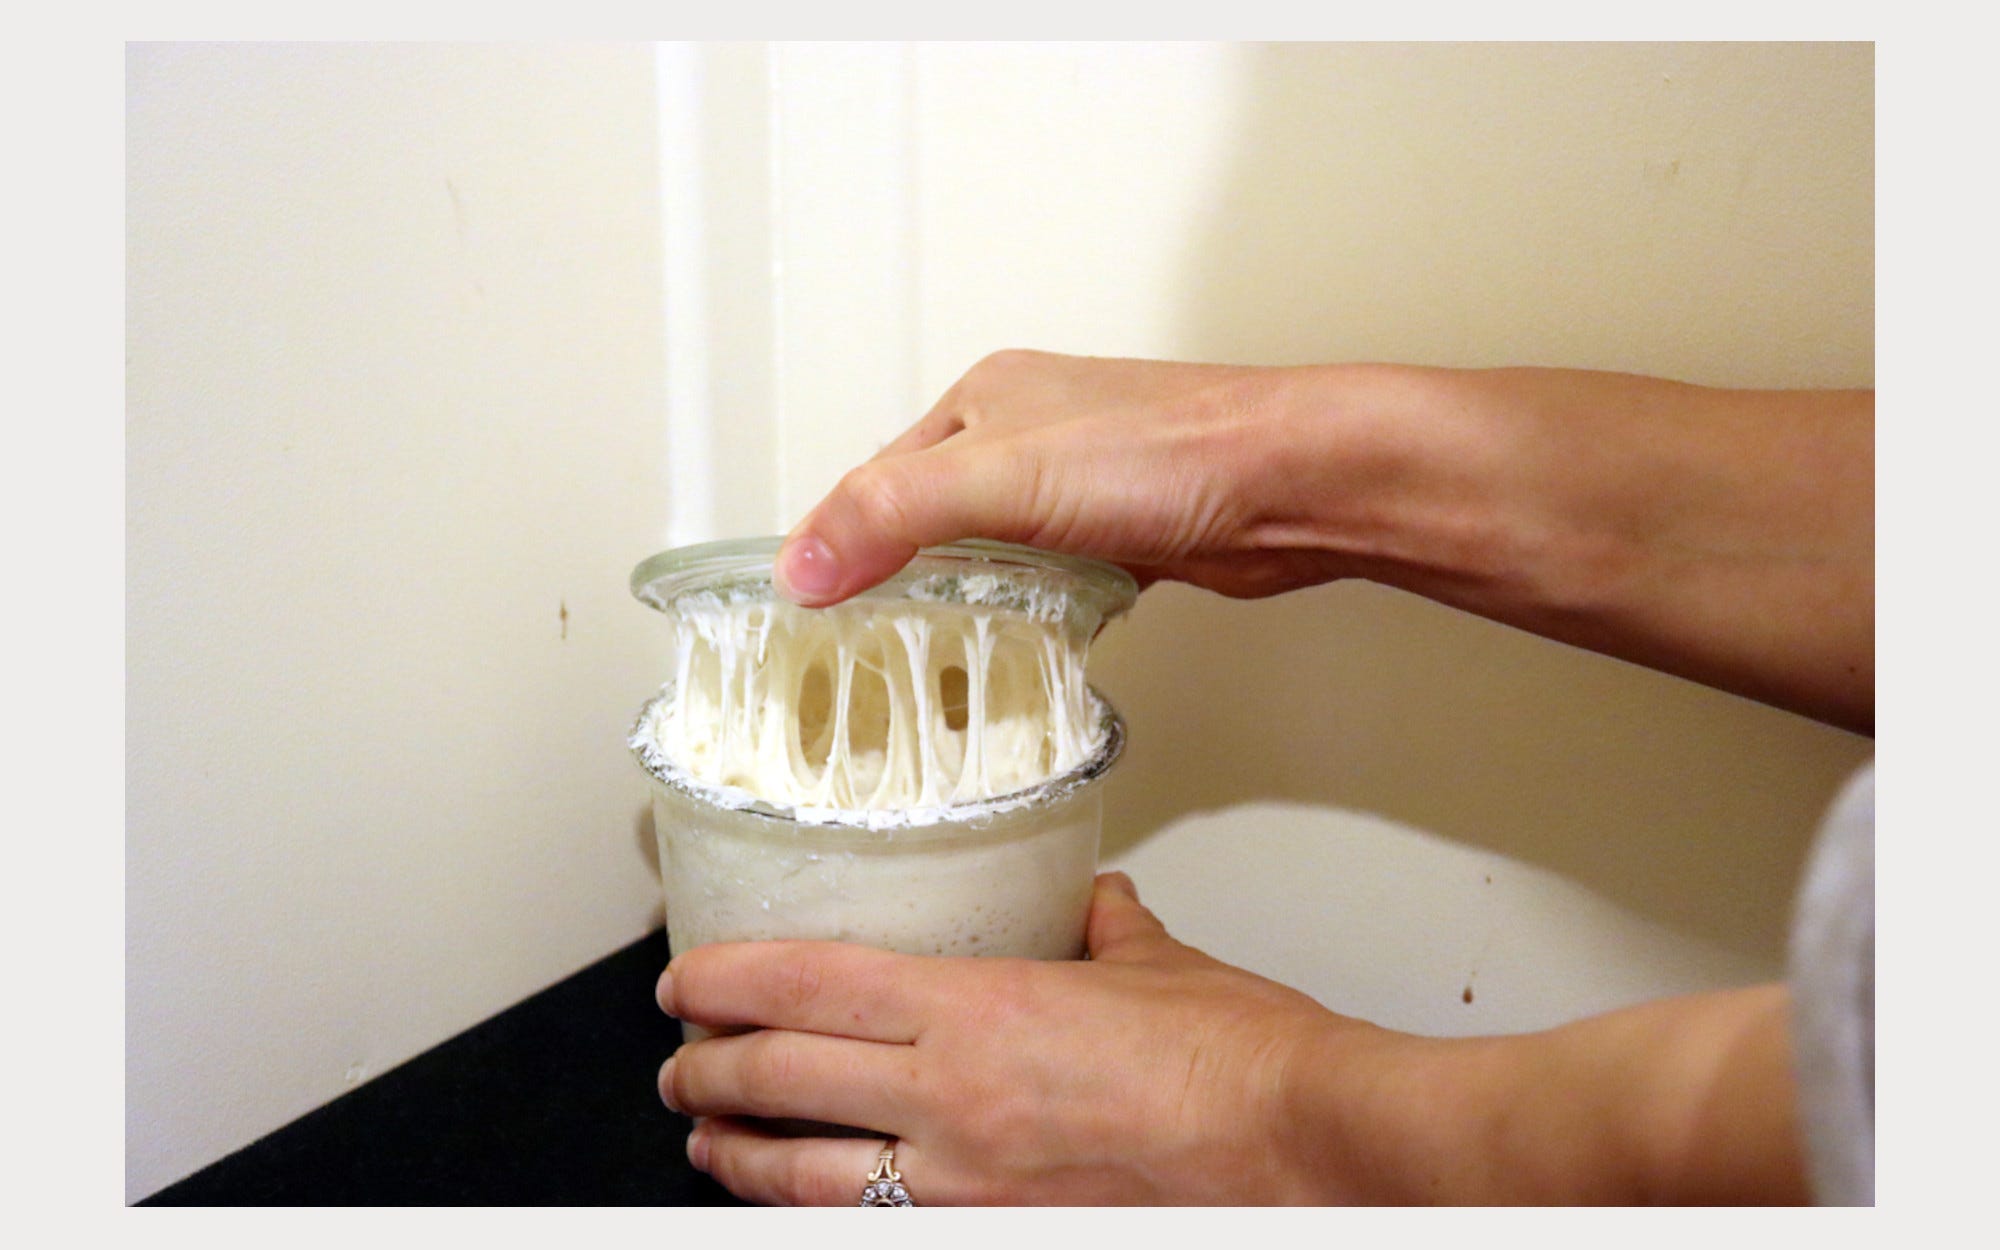
the starter should fall relatively cleanly as a big clump from the jar when tipped upside down, with only a thin layer left in the jar; you should also be able to pull the starter up from the jar with your fingers/a fork and it will fall back down in clumps rather than a runny sticky stream;
along the same lines as the point above, the jar shouldn’t be a massive hassle to scrape clean, because the starter will be cohesive/strong enough to pull away from the sides (my old starter was a sticky nightmare to remove from its jar, which made me dread discarding/feeding it; I thought this was normal, but with my new starter it’s a much cleaner and easier process)
the starter should more than double, and ideally triple (I understand there are some exceptions to this and that some starters that only double may be sufficiently strong, especially an all-rye or wholewheat starter, but my point here is that the starter should not be struggling to just double);
the starter should have a decent window of time in which it stays peaked/buoyant/domed, rather than collapsing quickly after peaking (unless it is very, very hot);
the starter should have a mild, not strong, smell.
These are the main things to be aware of. The take-home is that if you’re still pulling flops from the oven months into the game, you may actually be doing most things right but your efforts are being undermined by a weak starter. Of course, there are ways to strengthen your existing starter with intensive feeding routines and ratios, and by changing flours or incorporating rye flour, for example, but none of these things worked for me so I concluded that my starter just got off to a bad start when I first mixed it together (probably compounded by a clumsy feeding schedule and ratio during its early development, of which more below).
Important: once you obtain your strong new starter, to maintain its strength, I recommend a 1:2:2 feeding ratio. I often do 20g starter: 40g flour: 40g filtered water for maintenance (and then double or triple etc., before baking, depending on how much I’m baking and how much I need for each recipe). Make sure you use a scale for accuracy, at least until you’re familiar enough with the consistency that a 1:2:2 ratio yields (I still use my scales to be sure). In my experience, eyeballing it can lead to leaving too much starter in the jar and adding insufficient “food” (flour/water), which weakens the starter.
Extra tip: you probably already know this, but you should be using your starter at its peak (when it has doubled/tripled, has strong gluten strands and is domed/buoyant at the top). The structure of your dough will be more or less a reflection of the structure of your starter at the point of its incorporation into the dough. If you use your starter long after its peak, once it has deflated and its gluten strands have become slack and runny, your loaf will likely reflect this weakness of structure.
2) Take all recipes with a grain of salt
Perhaps a brazen claim from an amateur who knows nothing about recipe development, but it seems clear to me that some sourdough recipes are likely to lead you astray, and others much more likely to lead to a good result. As a beginner, I would mistrust any recipe that says something along the lines of “leave to rise for 6 hours somewhere warm” or “bulk ferment for 10 hours or until doubled”, with no qualification of the temperature that correlates to this time frame. Everyone, including those who write such vague instructions, knows that fermentation time depends thoroughly on ambient room temperature and also other conditions like starter strength. With that in mind, I would trust recipes either that pair bulk rise timings with specific temperatures (i.e. “ferment for 4-6 hours at 75°F/24°C”) or which include a disclaimer along the lines of “fermentation time will depend on temperature, so adjust accordingly” or “I do not specify bulk fermentation times because they are specific to your kitchen/home temperatures and starter”.
Similarly, instructions like “leave to rise until double” should be taken with a grain of salt, because if bulk fermentation occurs at warm/hot room temperature, leaving the dough to double may mean that fermentation speed reaches a rate that will make your dough prone to overproofing in the successive stages of the process like shaping and the second rise/proof, especially if the latter is done as a long overnight “cold retard” in the fridge, where it will take some time to cool down to fridge temperature and continue to proof all night, albeit at a much slower rate (read more on this point at The Sourdough Journey).
On the other hand, I have found that if temperatures are mild, say around 21-22°C or below, then it is perfectly fine to leave the dough to roughly double, especially an all-white dough (as wholewheat dough tends to ferment quicker). In my early months of baking, I sought much guidance in a sourdough Facebook forum and everyone was hyper-cautious about not letting their dough reach 100% rise (double), even at lower temps. Equally, people claimed that if the dough “jiggles” at the end of bulk, it most likely will overproof, despite other online advice suggesting this was a good sign of readiness. In my experience, some of my best loaves have indeed come from dough that doubled and jiggled at the end of bulk rise. As I stressed earlier, if your starter is strong, you have a wider grace period for both the first and second proofing. An extra hour in either shouldn’t spell ruin, unless it is a very warm day.
The last thing to note about recipes is that they are guides, not protocols, meaning they can’t possibly account for every variable and so can’t guarantee success even if followed to a T. Of course, this is the deeply frustrating but also uniquely addictive and empowering thing about sourdough baking — at some point, you’re out there on your own, you must fail on your own and learn why you failed, on your own. No one can really hold your hand in this process. It took me 3 months of shoddy loaves to start seeing success.
3) Buy a seed-warming mat
This one sounds trivial, but if you live in a cool climate, if your house is prone to cold drafts, or if its winter and you’re still stuck in a sourdough rut, it can really help to raise the ambient temperature at which both your starter and dough is fermenting, in order that you can observe their rise within a reasonable window of the day and not get to that awkward point where it’s 12am and you really need to sleep but you also haven’t yet shaped your dough because it’s not sufficiently fermented. The spenny solution is a so-called “sourdough home” or electric proofing box, but it’s an unjustified expense for an amateur baker who can get similar results with a humble seed-warming mat. I purchased mine for around $30 AUD. Make sure you cover the mat with a tea towel before placing your starter jar or bowl of dough on top, as otherwise the base of these vessels can overheat (and lead to overproofing). The ambient temperature right near the mat can be raised by between 10-20°C! Though of course this diffuses into the air. I usually place one thick or two thin tea towels between the mat (the heat source) and the fermenting dough, and then wrap the tea towels up over the dough, to create a kind of make-shift proofing bubble. Make sure you watch your dough closely if you choose to do this. It can speed bulk fermentation and proofing times up significantly.
The bottom line
If you’ve upgraded to a dynamite starter but your bread is still sub-par, all I can say is keep going. You’ve wasted too much flour to quit now! I’m willing to bet you’re doing most things right but that one significant variable is eluding you. You’re bound to figure out, eventually, what that is.
In the meantime, feed your gummy pancake-loaves to your partner. If he’s anything like mine, he’ll think they’re actually good…